# Azure Active Directory

## Integrating Single Sign-On (SSO) with Azure for Dot

Follow these steps to create and configure a Single Sign-On (SSO) integration with Microsoft Azure for the Dot application.

### Step 1: Register a New Application in Azure

1. Go to the Azure portal and navigate to **Azure Active Directory** > **App registrations**.
2. Click on **New registration**.

### Step 2: Application Registration

1. Enter the name of the application, for example, `Dot Azure SSO`.
2. Under **Supported account types**, select the relevant option for your organization.
3. For the **Redirect URI**, input the URI provided by your Dot settings.

<figure><img src="/files/9qlLBY5ey0XTIZ7C8m9A" alt=""><figcaption></figcaption></figure>

### Step 3: Application Overview

1. Once the application is registered, you will be redirected to the application's overview page.
2. Copy the **Application (client) ID** and **Directory (tenant) ID** and save it for later use.

<figure><img src="/files/NIPbD0Ql0cUuj7lgiXSo" alt=""><figcaption></figcaption></figure>

### Step 4: Certificates & Secrets

1. In the application's menu, click on **Certificates & secrets**.
2. Click on **New client secret**.
3. Add a description for the secret and set an expiry as required.
4. Once created, copy the value of the client secret.

<figure><img src="/files/gUrWsjXBUTzCCWzlk5dJ" alt=""><figcaption></figcaption></figure>

### Step 5: Adding the Client Secret

1. You can now see the newly created client secret listed.
2. Note the secret's value, as it will be used in the Dot application configuration.

<figure><img src="/files/IPaeCj44ZiIHDXL3Oq6N" alt=""><figcaption></figcaption></figure>

### Step 6: Integrating with Dot

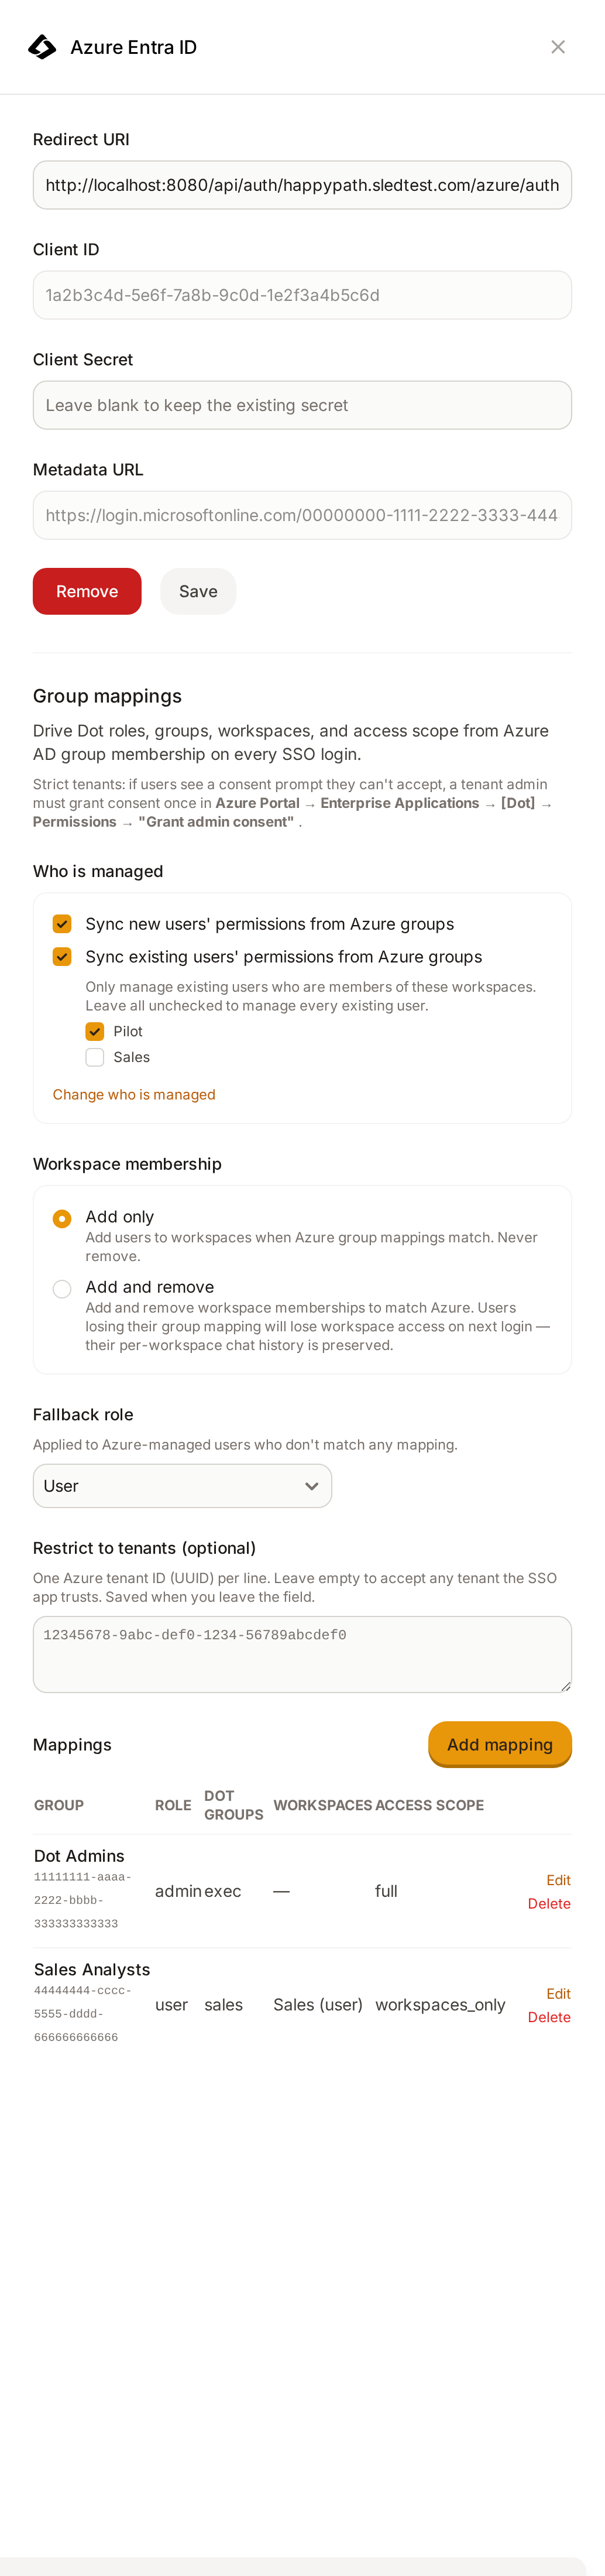
1. With the **Application (client) ID** and **Client Secret** copied, navigate to your Dot settings.
2. Paste these values into the corresponding fields in the Dot Azure SSO settings.

### Step 7: Metadata URL

1. The Metadata URL is essential for SSO operations. Construct it using your Azure tenant ID that you have got in step 3:
   * Format: `https://login.microsoftonline.com/{tenant-id}/v2.0/.well-known/openid-configuration`

### Finalizing the Integration

Once you've completed the above steps:

1. Save the configuration in Dot.
2. Test the SSO integration to ensure that it's functioning correctly.

## Configure Which Users Get Access

1. In Azure, go to the "Enterprise application" created for Dot authentication and on the left change to "Manage" -> "Users and Groups"
2. Press "Add user / group" and then add single users or groups that should be able to login

<figure><img src="/files/nuavyUprhOESy4SF66YB" alt=""><figcaption></figcaption></figure>

3. Then on the left change to "Manage" -> "Properties"

<figure><img src="/files/s4LoRn5HFnRwMFkj66Qe" alt=""><figcaption></figcaption></figure>

4. Activate "Assignment required" → Now only users directly assign to this application by user or group can use the SSO in Dot to login


---

# Agent Instructions: Querying This Documentation

If you need additional information that is not directly available in this page, you can query the documentation dynamically by asking a question.

Perform an HTTP GET request on the current page URL with the `ask` query parameter:

```
GET https://docs.getdot.ai/integrations/sso/azure-active-directory.md?ask=<question>
```

The question should be specific, self-contained, and written in natural language.
The response will contain a direct answer to the question and relevant excerpts and sources from the documentation.

Use this mechanism when the answer is not explicitly present in the current page, you need clarification or additional context, or you want to retrieve related documentation sections.